# Überprüfung der Einstellungen des Posteingangsserver
#### 1. Öffne "Einstellungen" auf deinem Startbildschirm.
[](https://wiki.camyno.com/uploads/images/gallery/2024-09/pD2BlBvAuM6yeI8a-image.png)
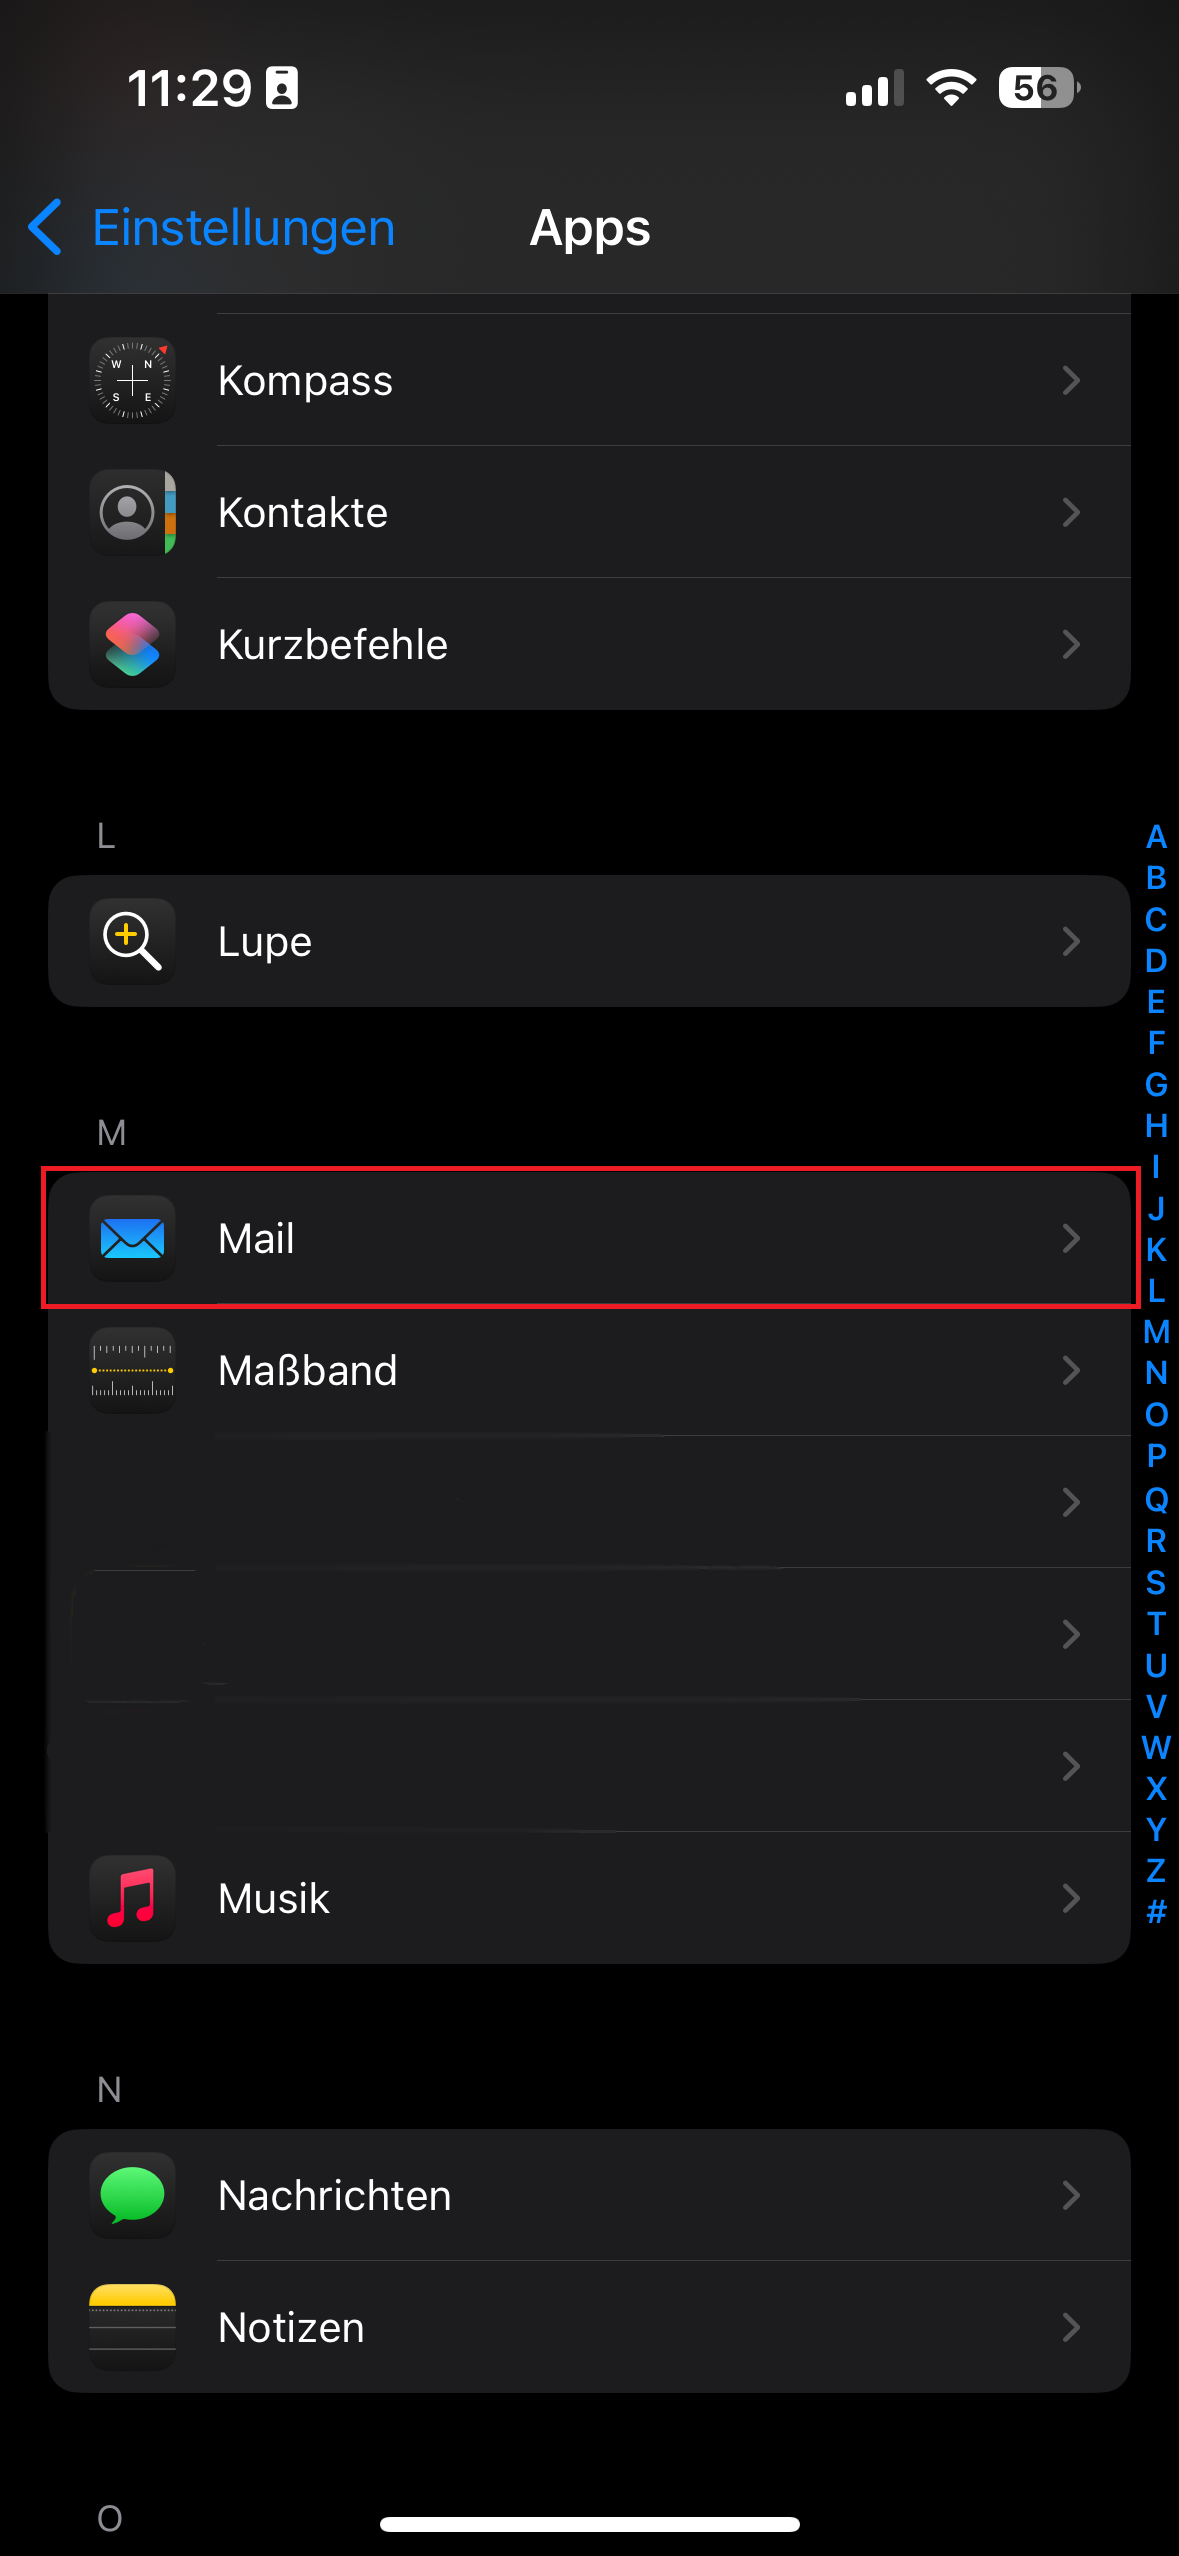
#### 2. Scrolle bis ans Ende und wähle "Apps" aus.
Achtung! Dieser Schritt ist nur bei iOS 18 nötig, hast du du noch eine ältere Version, springe direkt zu Punkt 3.
[](https://wiki.camyno.com/uploads/images/gallery/2024-09/mHIIKjYshGLLYkPr-img-0445.PNG)
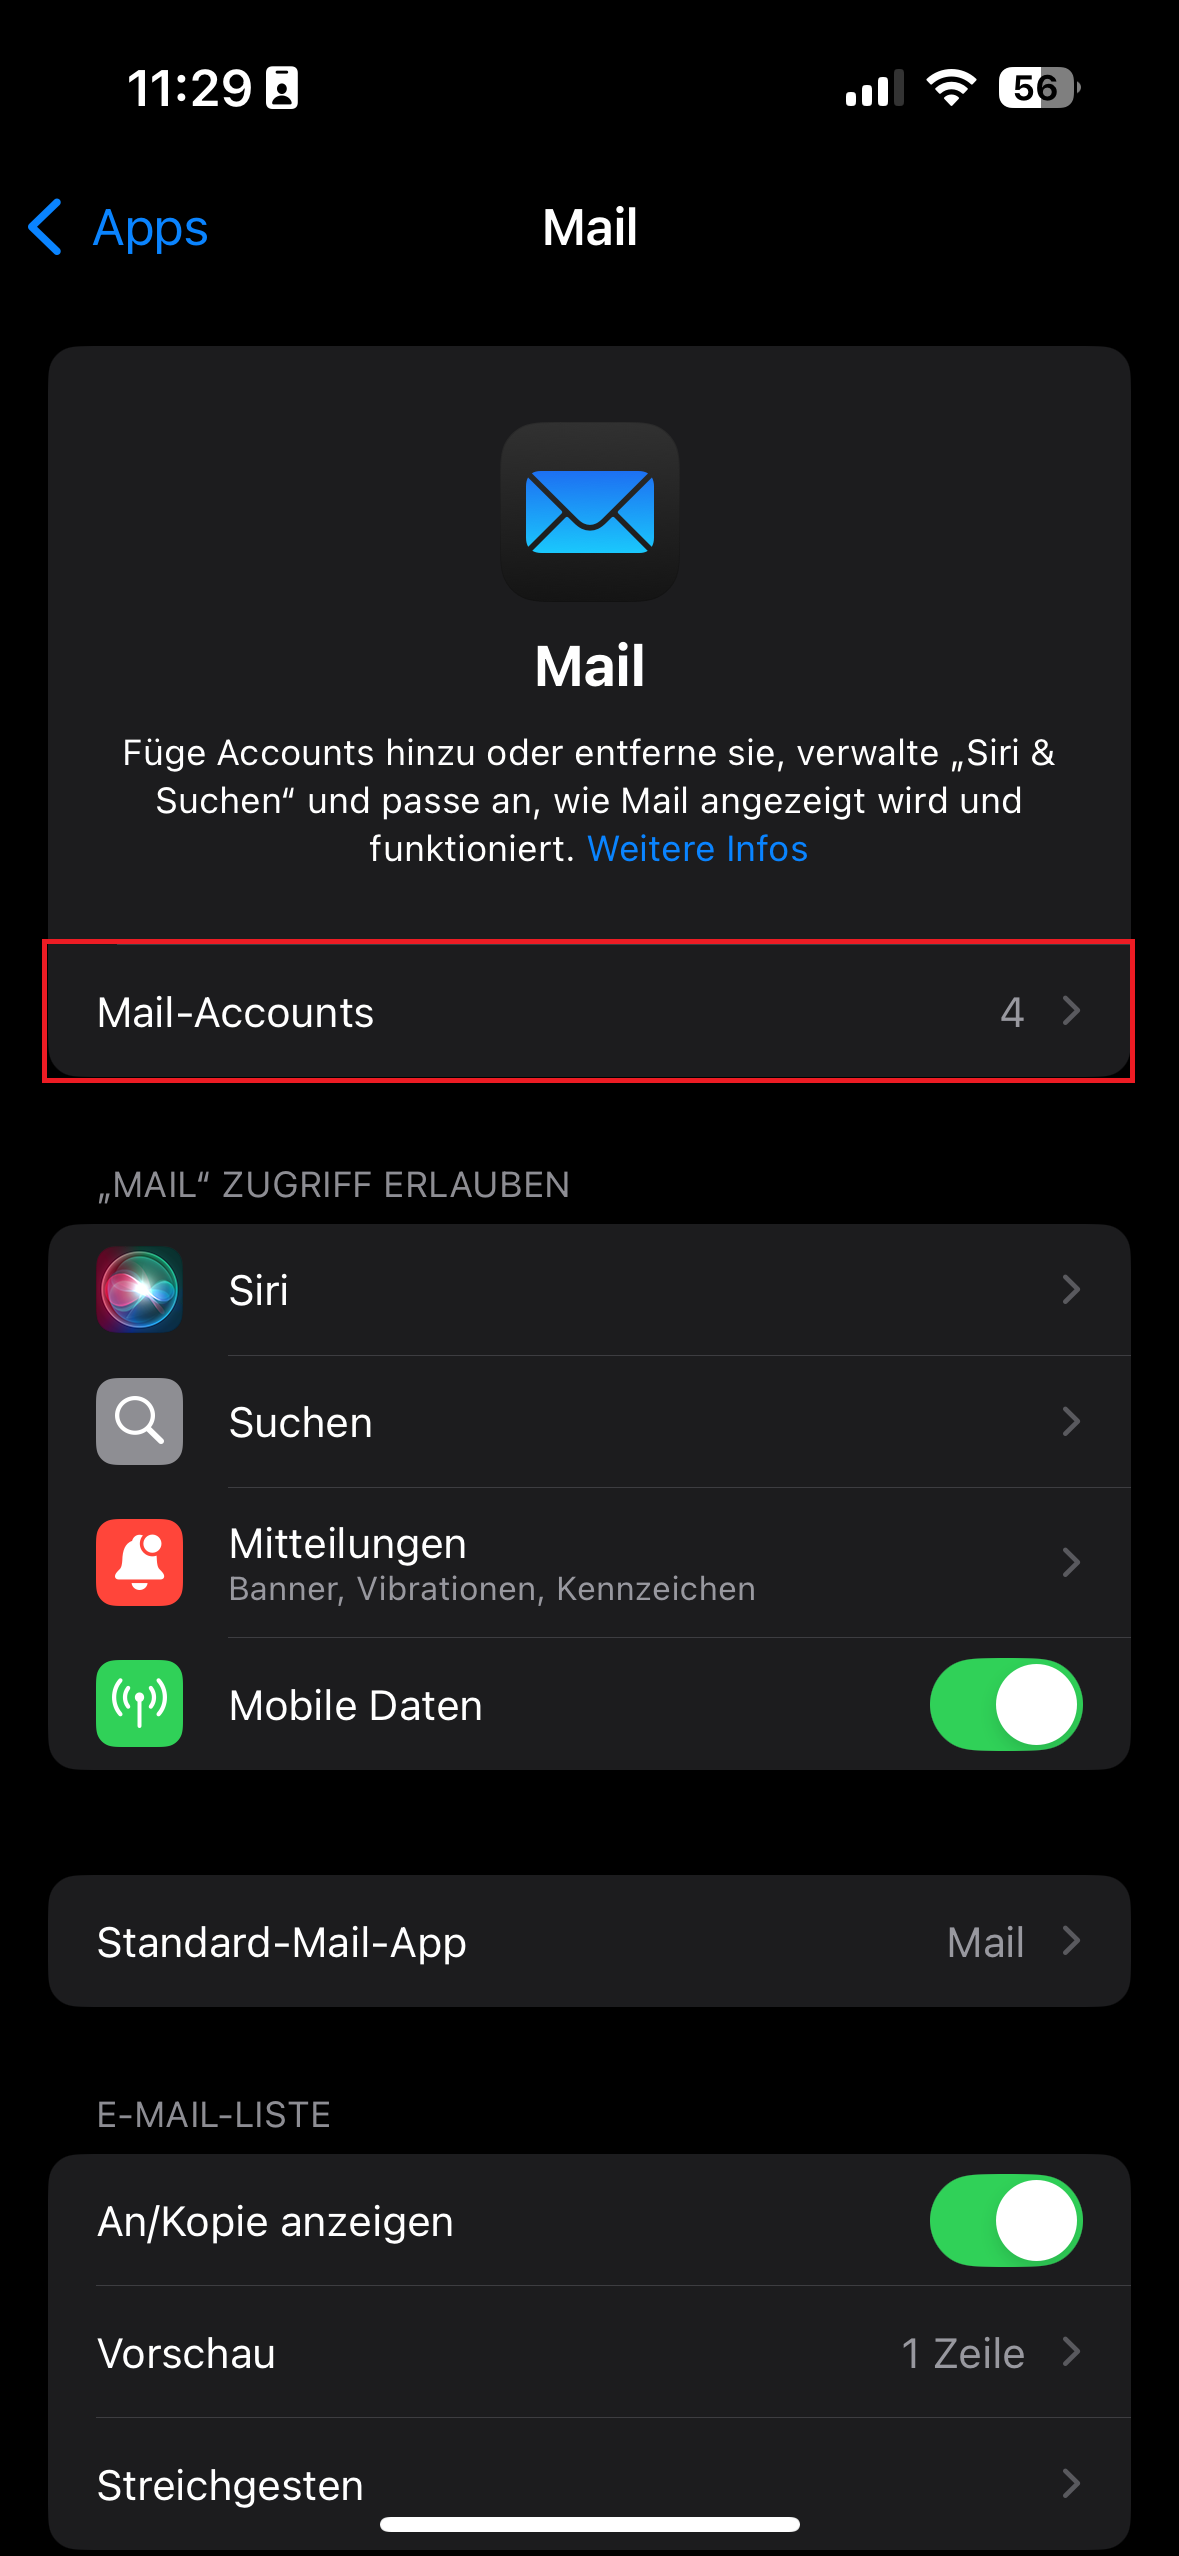
#### 3. Wähle den Punkt "Mail" aus.
[](https://wiki.camyno.com/uploads/images/gallery/2024-09/lJJFf1FKP6Sad6XM-img-0446n.PNG)
#### 4. Wähle "Mail-Accounts" und anschließend deinen Mailaccount, den du kontrollieren willst, aus. Tippe im Anschluss auf "Accounteinstellungen".
[](https://wiki.camyno.com/uploads/images/gallery/2024-09/7aJh7uWA3mg5QdrS-img-0447.PNG)[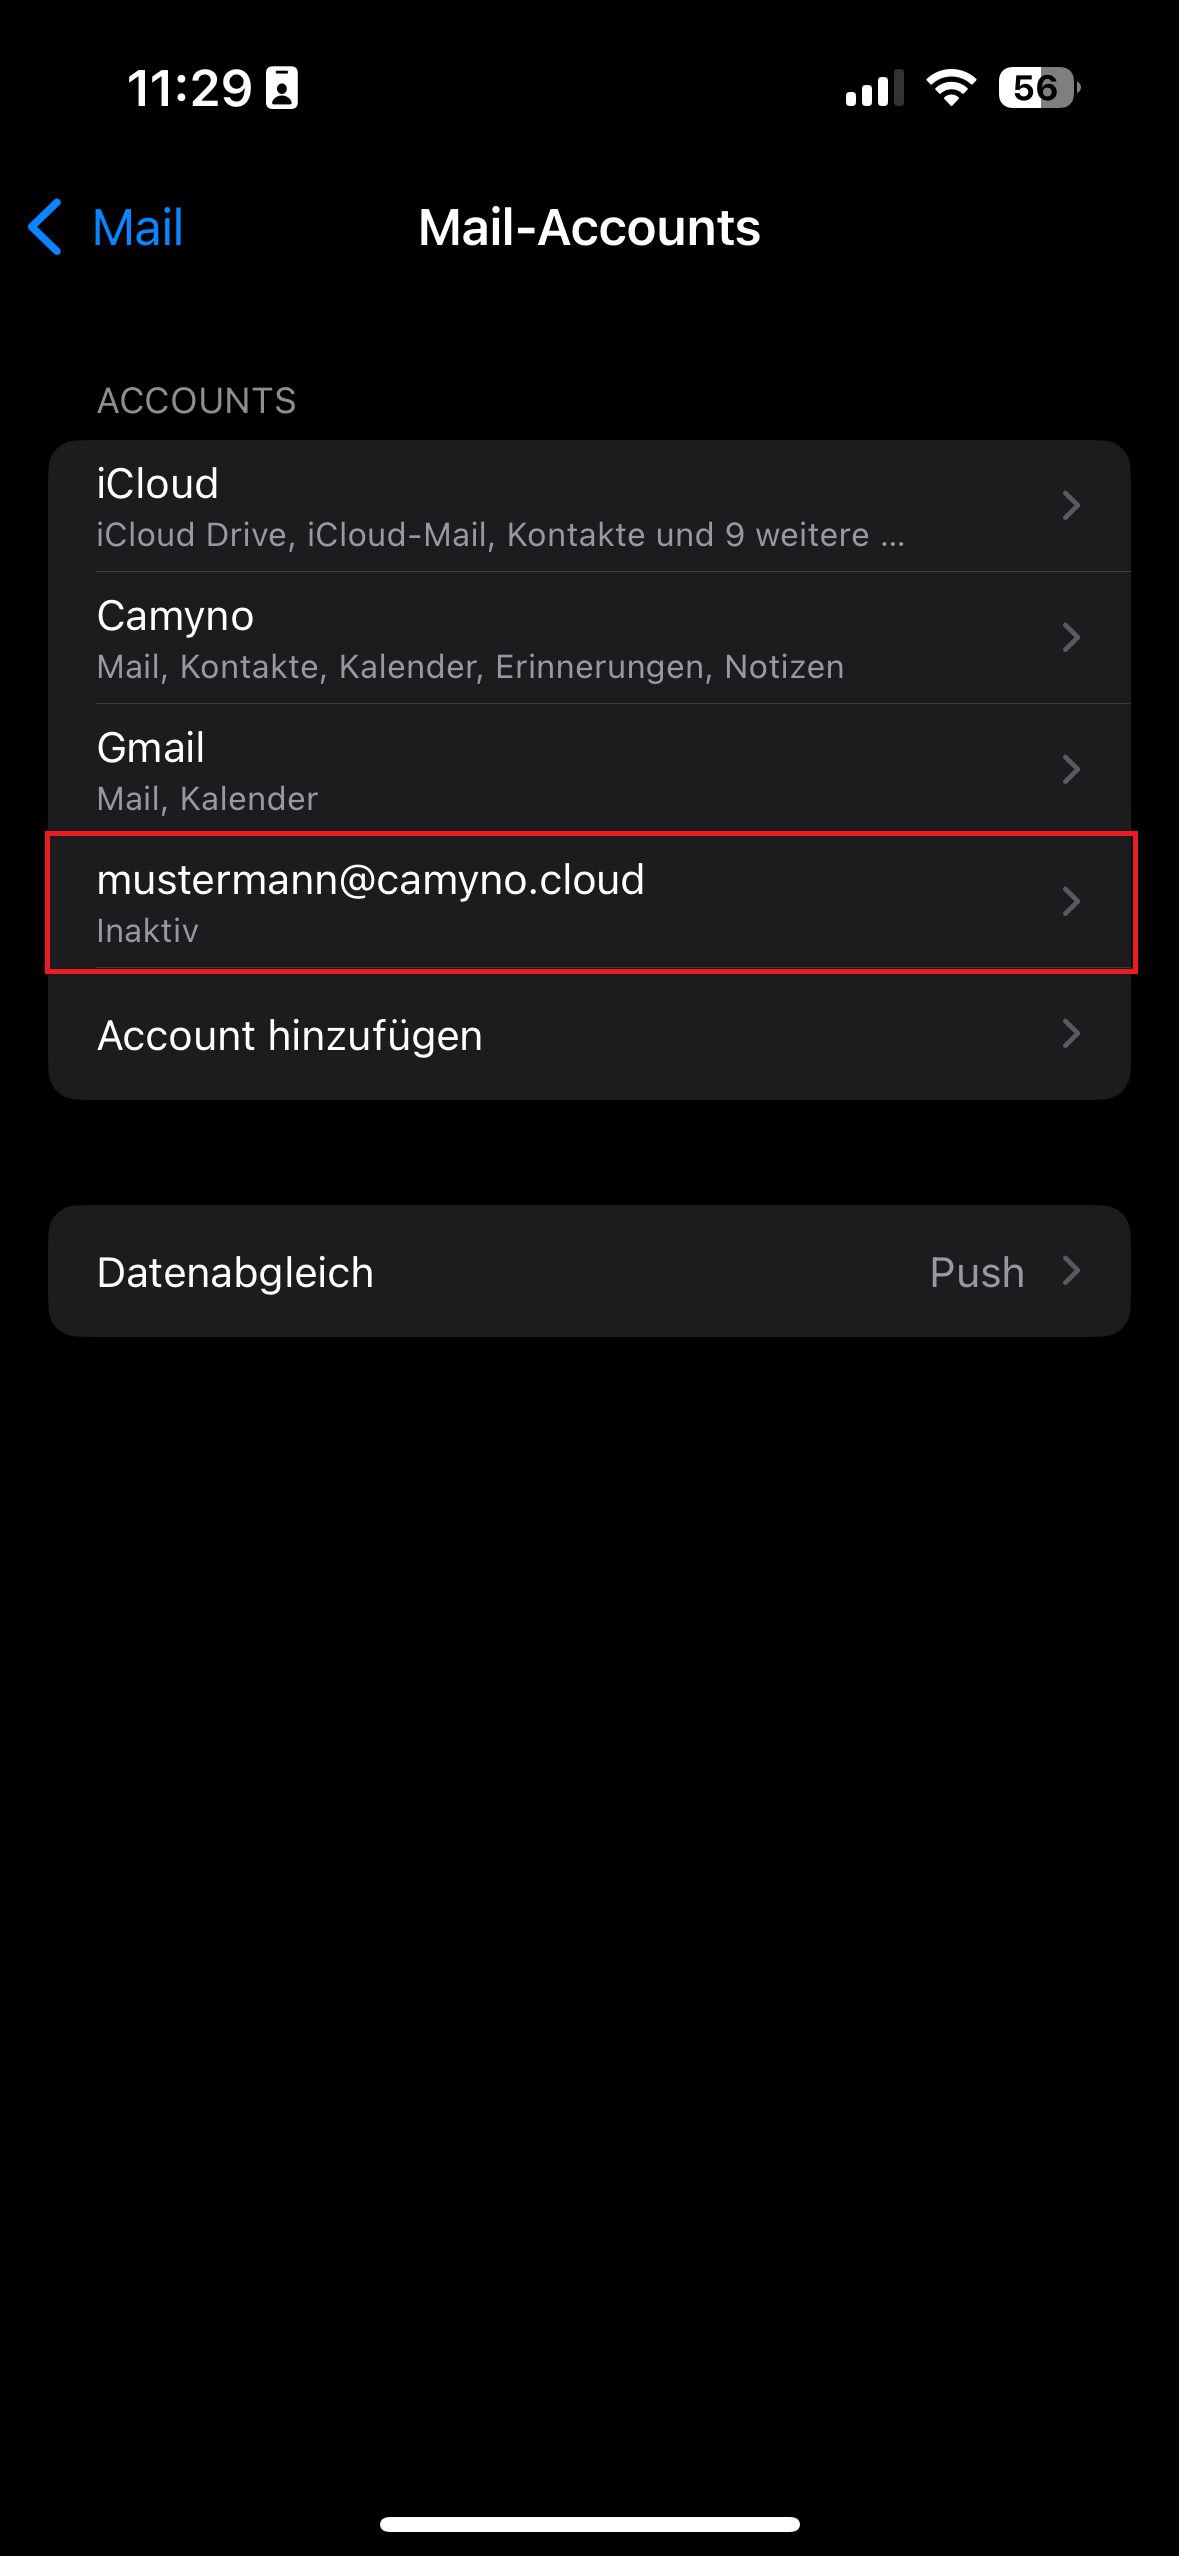](https://wiki.camyno.com/uploads/images/gallery/2024-09/jKDMYsCktcZaZakr-img-0448.PNG)[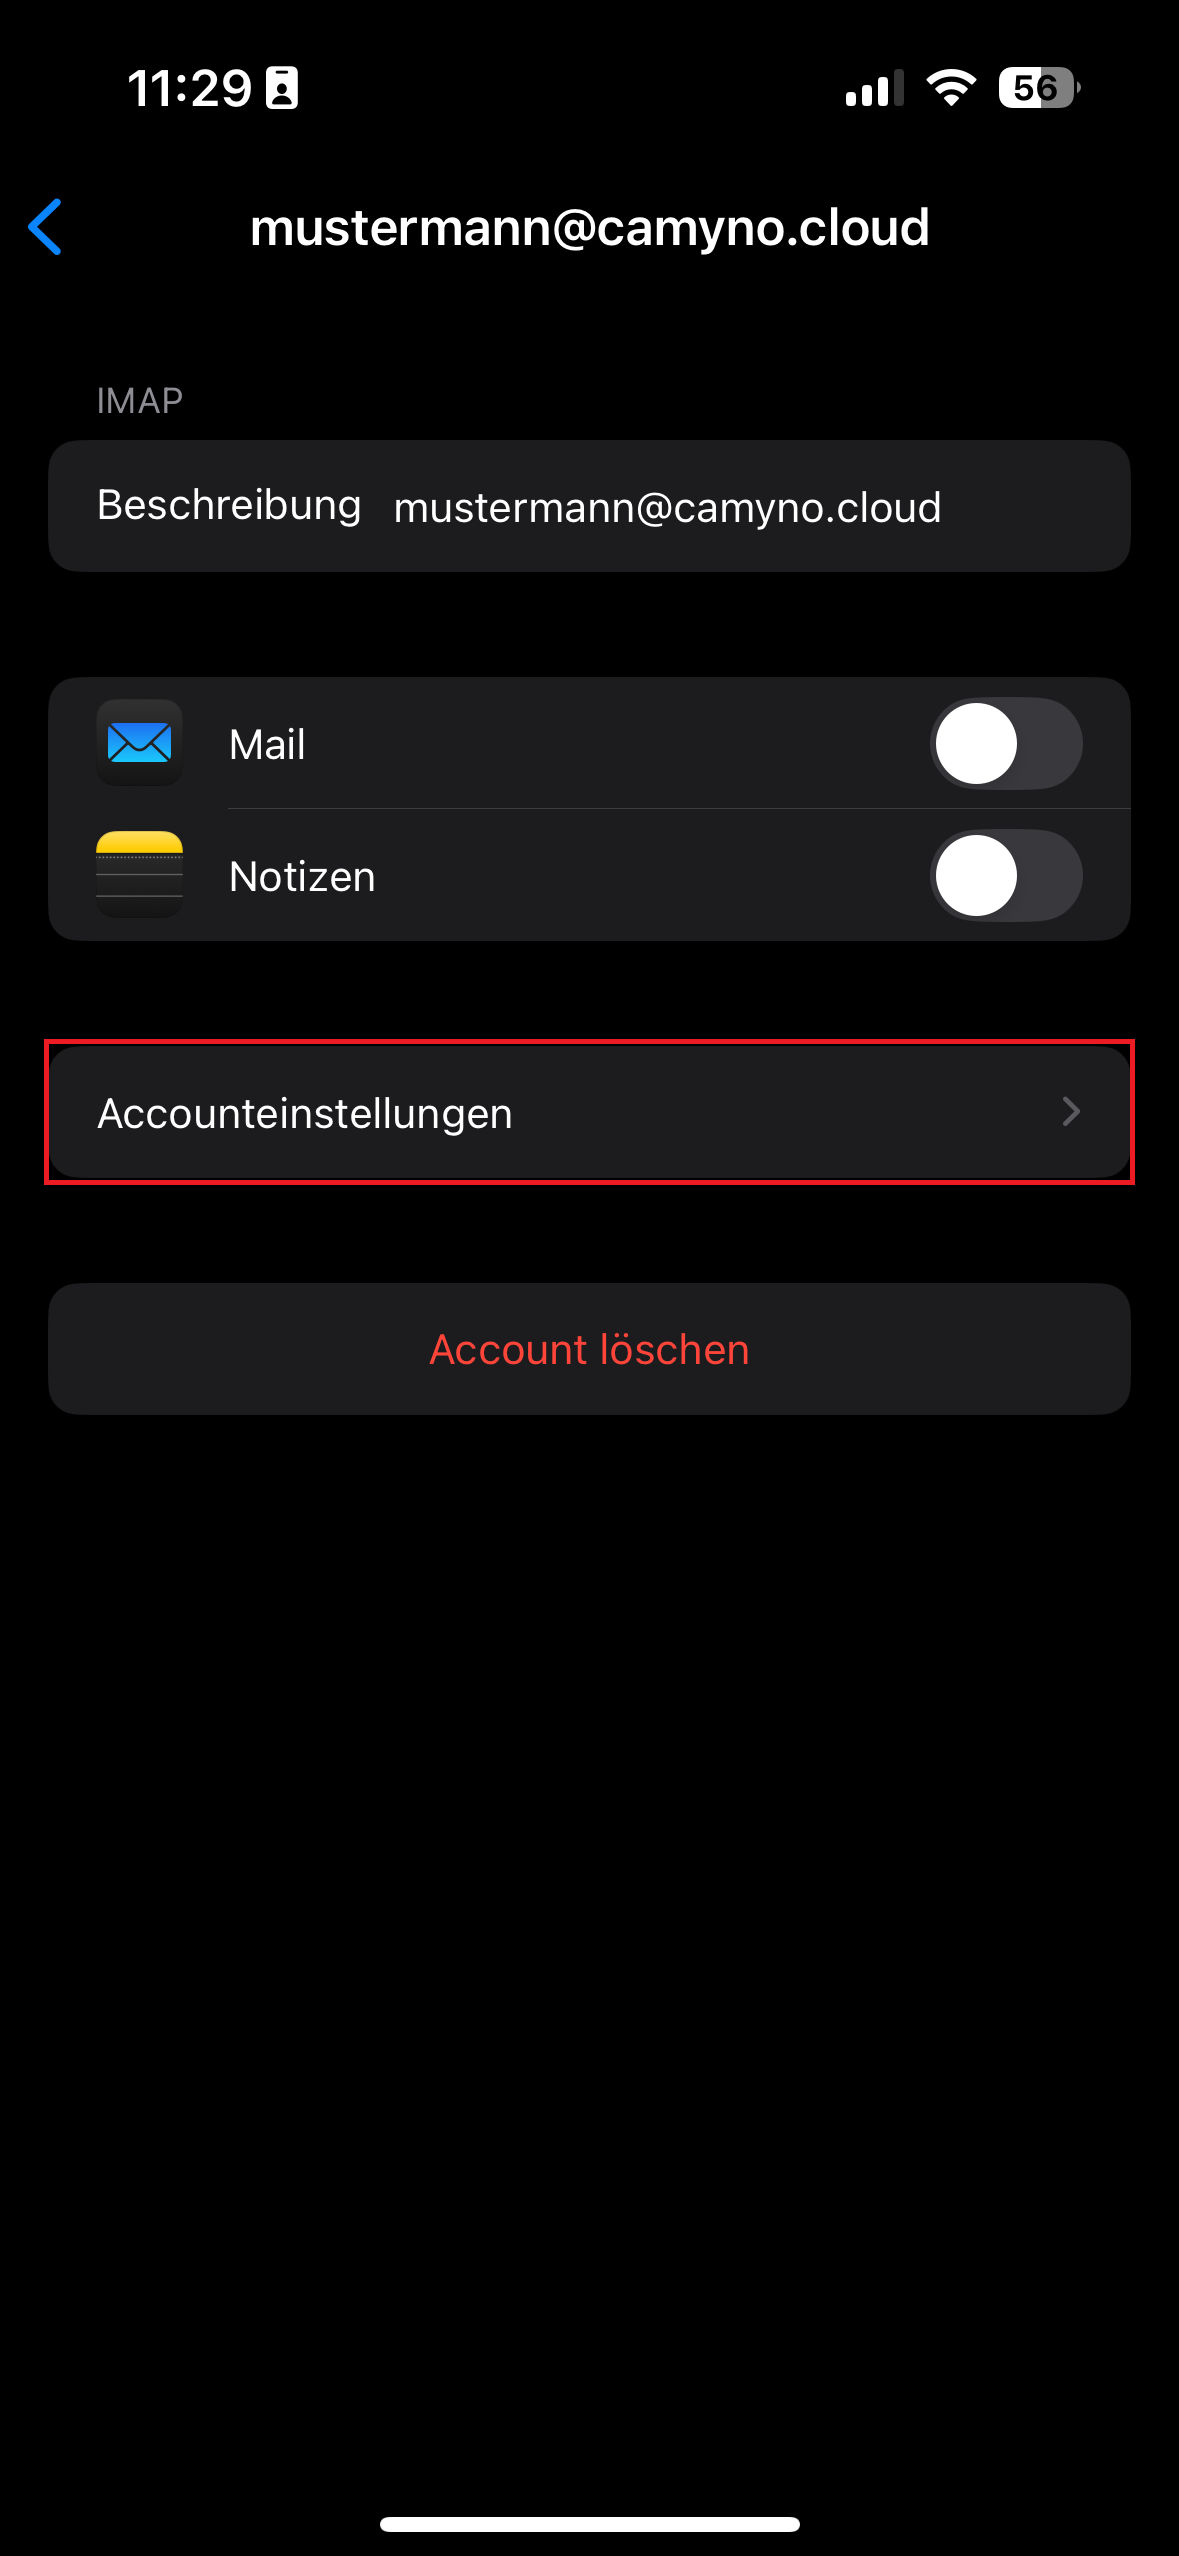](https://wiki.camyno.com/uploads/images/gallery/2024-09/9NqLdtdkux6TtOTf-img-0449.PNG)
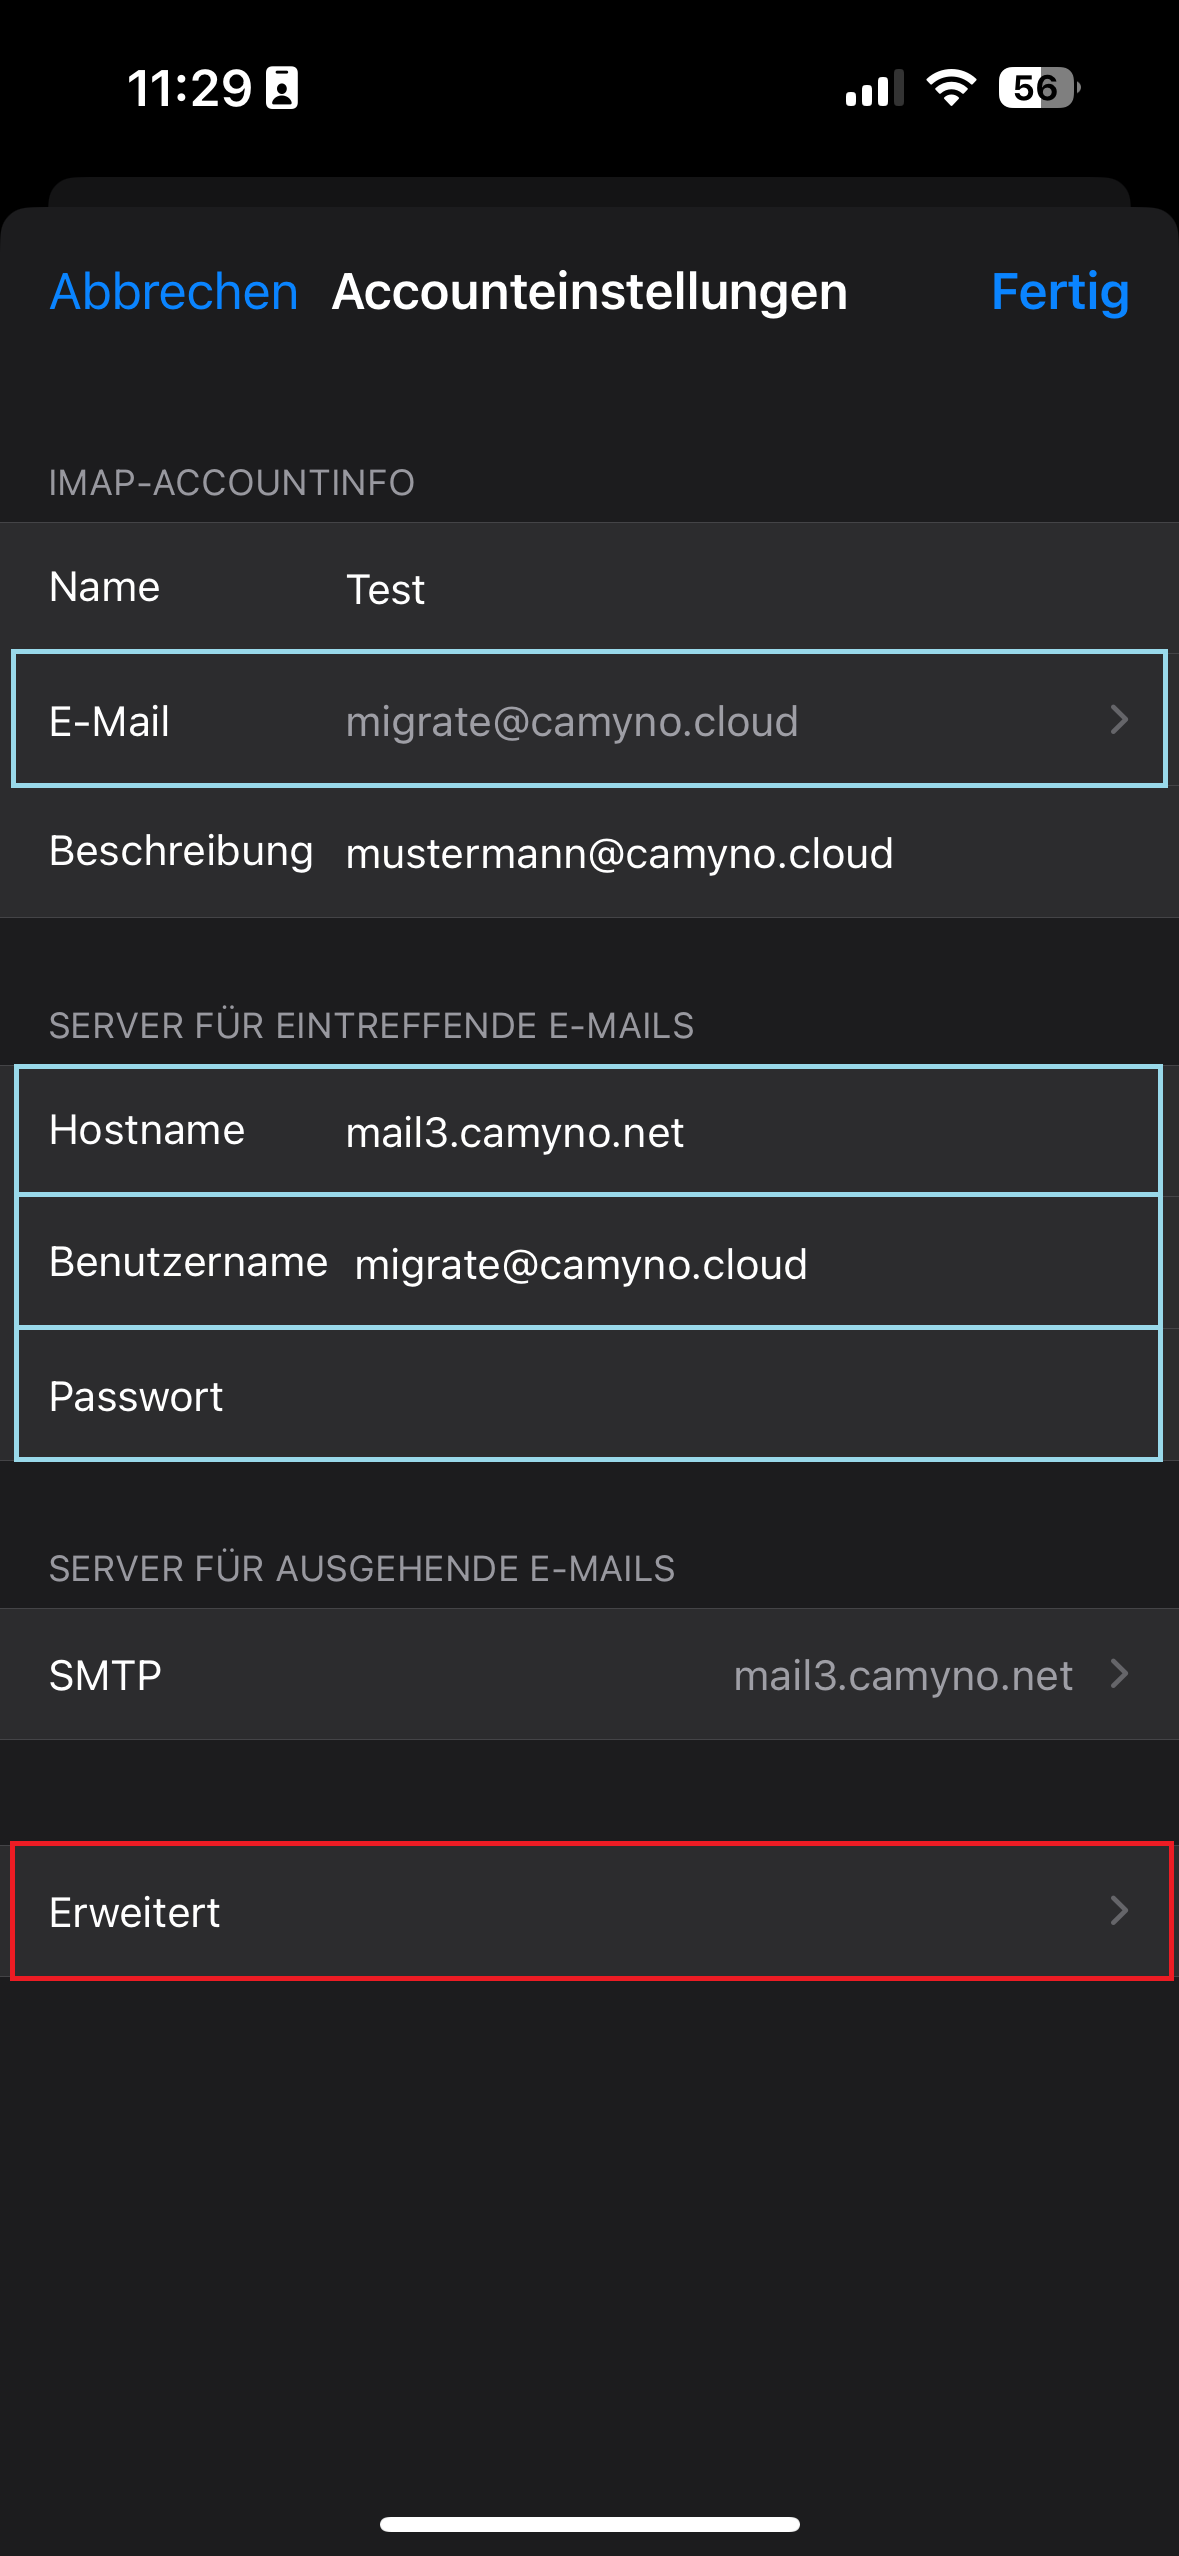
#### 5. Kontrolle der Einstellungen
5.1 Stelle sicher, dass bei den Punkten **E-Mail** und **Benutzername** deine **vollständige Mailadresse** drin steht. Achte auch darauf, dass sich am Ende kein Leerzeichen befindet.
5.2 Stelle sicher, dass bei Server der richtige Posteingangsserver eingetragen ist. Bitte dem Datenblatt entnehmen: **mail1.camyno.net**, **mail2.camyno.net** oder **mail3.camyno.net**
5.3 Tippe ggf. dein Passwort neu ein.
5.3 Öffne im Anschluss den Punkt "Erweitert"
[](https://wiki.camyno.com/uploads/images/gallery/2024-09/CIA3nWUA2zbKCOqb-img-0450.PNG)
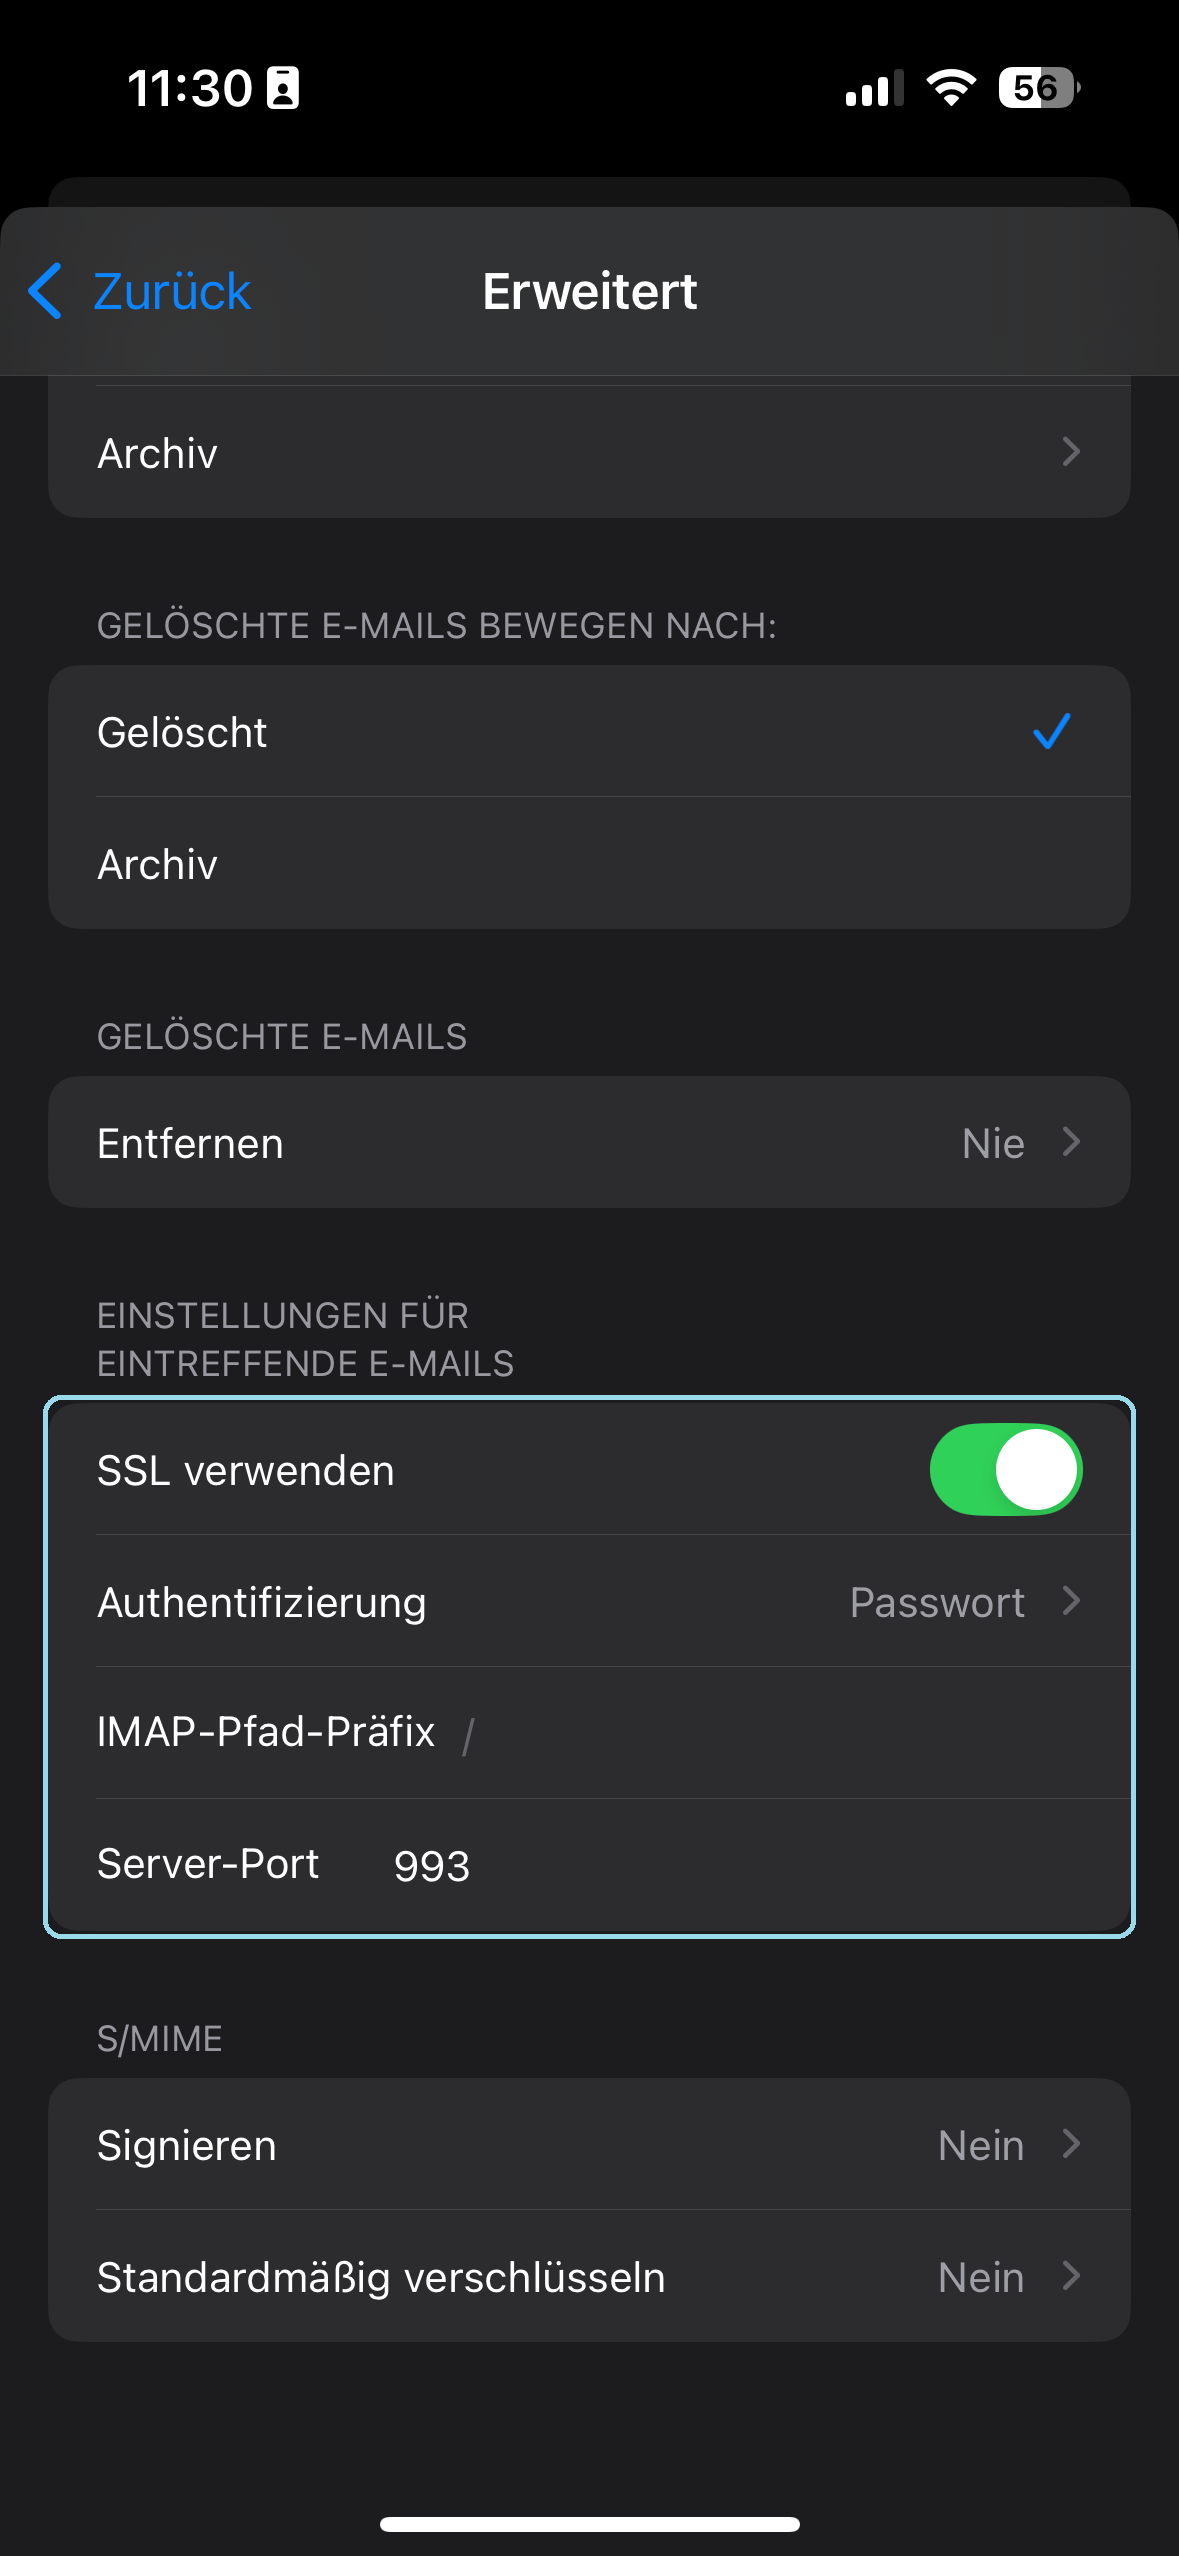
#### 6. Erweitert
Stelle sicher, dass die Punkte unter "Einstellungen für eintreffende E-Mails" wie folgt aussehen:
- SSL verwenden muss ausgewählt sein
- Authenfizierung: Passwort
- IMAP-Pfad-Präfix: leer lassen
- Server-Port: 993
[](https://wiki.camyno.com/uploads/images/gallery/2024-09/xLB5ZD4IYhBhlNnW-img-0451.PNG)
Wenn alle Einstellungen korrekt eingestellt wurden und dein Passwort stimmt, werden eingehende Mails wieder korrekt im Posteingang angezeigt. Falls es weiterhin zu Problemen kommt, wende dich bitte an den [Support](https://camyno.com)